FOOL : Making of
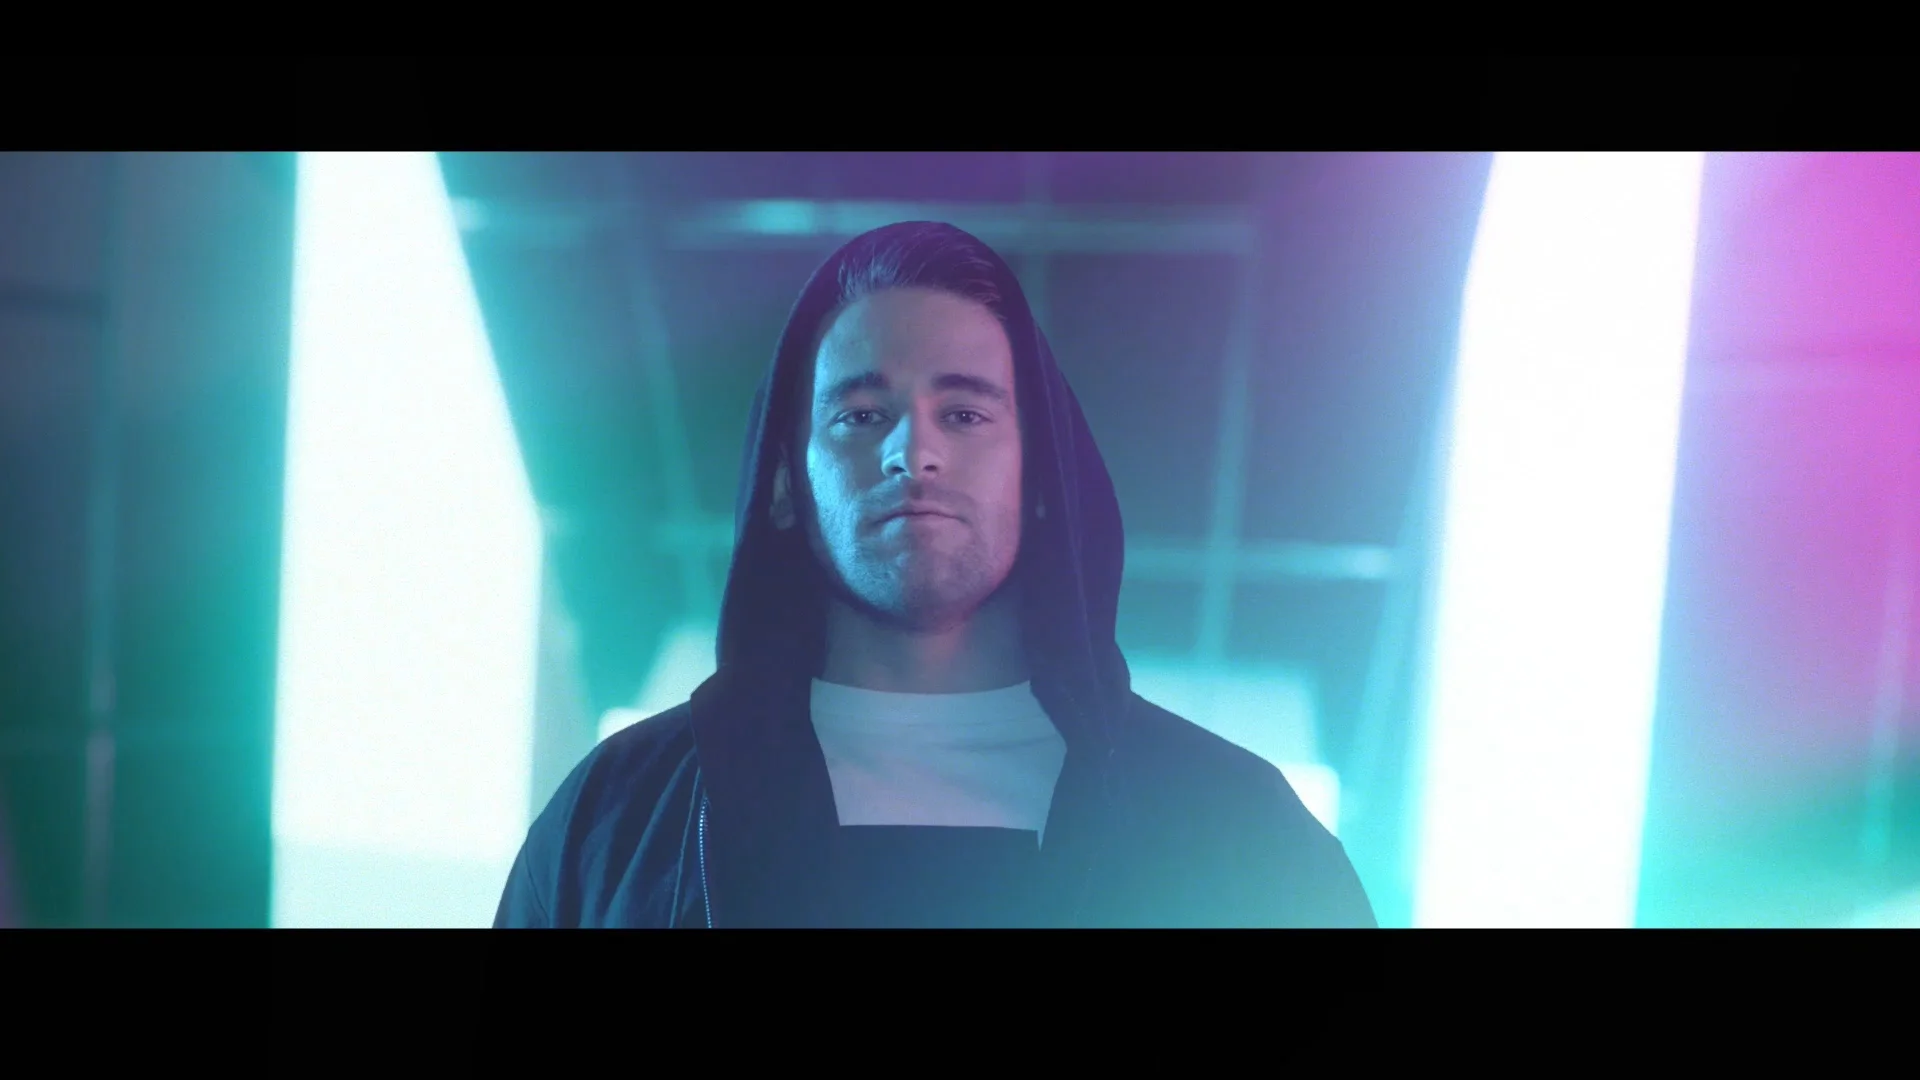
This is the official music video for the single ‘Fool’ from Lee Mvtthews, a New Zealand based Producer/DJ duo. It follows the story of two otherworldly characters as they experience the contrast between a world built by man and one of natural beauty.
When starting the project, I was very keen to pitch a concept that would allow me to use a blend of CG and Plate Photography, creating an otherworldly atmosphere. I wanted to build something unique, a music video that stands out as different.
I wanted to take full advantage of the fact that I can control the world I was creating by giving the characters the power to control their own environment. This became a key concept to the video.

The project was a challenge I was excited to take on because I wanted to further explore the freedom of creativity that comes with using realtime rendering for VFX heavy content. Fool was created from an initial idea to final delivery in a little under three months; a big task for such a large amount of work and a very small team.
The video became a combination of realtime rendering of CG sets, all done in Unreal Engine and plates shot on green screen. Although a lot of artists are currently experimenting with game engines for filmmaking, there isn’t a lot of work out there blending realtime CG and filmed plates.
There is, however, so much to gain from using this technique compared to the traditional vfx pipeline.

Choosing Unreal Engine
My main tool was Unreal Engine and it delivered an amazing experience from previs all the way to the final composited frames.
I had previously used it for another music video experiment, Black Mass, and I was blown away by the quality you can achieve in a short amount of time. This time I decided to take things one step further in terms of complexity. So I set myself a few challenges :
Create an edit as close to final as possible directly in engine.
Work with green screen plates and do as much of the compositing work directly in engine.
Only use dynamic lighting.
At first these could sound like limitations, but it was actually a plan that would allow me to be incredibly fast and flexible.

The Production plan
Fool was produced by Rosalind Stratton, who was responsible for everything from big picture planning to making sure everything was perfect during the live action shoot. With such a short time frame, having everything scheduled was key to an efficiently managed project.
We split the project into four stages : Pitch / Previs / Plate Photography / Post Production. Assigning blocking timelines to each of these stages created a framework for us to work in. Our approach was simple : Use the power of iteration we get from working with a realtime engine.
Rather than trying to get the perfect shot right away, we always pushed to get the entire project to a specific state and only then go back to the weakest part and start improving. By applying this idea over and over again we had an ever-evolving, constantly improving, full product.

This was an invaluable step because it wasn’t only used to sell the idea for the video, but also as a script, storyboard, visual development guide, character and environment reference. I wanted to do more than just a director’s treatment explaining the mood, I also wanted to create a strong base for my previs.
So I built the progression of my simple narrative, the key shots and the overarching visual language, all put together in a pdf document that could explain at a glance where I wanted to go with the project.

Previsualisation
Once I got the go ahead, I started working on a full CG previs for the three minutes of animation I had to create. Having to build three very large sets, deal with the camera work, the edit, the character lighting blocking and fx seems insanely daunting for one artist to take on so even thing stage was scheduled so I wouldn’t fall behind.
The sets
Before I could start building my shots, I needed to build the sets that the action would take place in. My first stop was Unreal Marketplace, because there are tons of fantastic resources available as a starting point.
There is a lot of free content, like the Kite demo pack released a couple of years ago, that is just amazing. It contains some fantastic processed photogrammetry scans, and can easily be the base for a nature driven set. In this case, I used the rock collection to populate my desert scenes.

As the base for the city I used another marketplace asset, a city downtown level that is extremely flexible and comes with a number of fantastic assets that can be used for set dressing. I felt that the price was totally affordable for what I was getting and it gave me the freedom to jump in and start setting up my world.

Another fantastic website that I recommend is sketchfab.com. It is an incredible resource for assets, with so many incredibly talented artists sharing their work. I am a massive fan of drone footage that has been processed as photogrammetry, as this can be a fantastic base for your environment build. For Fool, I used this amazing desert road scan from “Effective Technology Integration“ : https://sketchfab.com/eti

Using these as my building blocks, I already had a rough version of my two environments, a desert at sunset and a city at night. A lot of time could have been spent creating the assets from scratch, but using the resources available allowed me to take some very big steps really quickly.
Here are some very early tests :


Character blocking
Following the same idea of using available assets and focus my efforts on the creative, I also found a fantastic shortcut for my character animations for the previs. Epic Games has made available an amazing variety of characters from Paragon, all of them with their own animation vignettes. These are extremely easy to use in the sequencer, with very simple controls for retiming, so it gave me a way of blocking the actions of my character quickly from very early on.
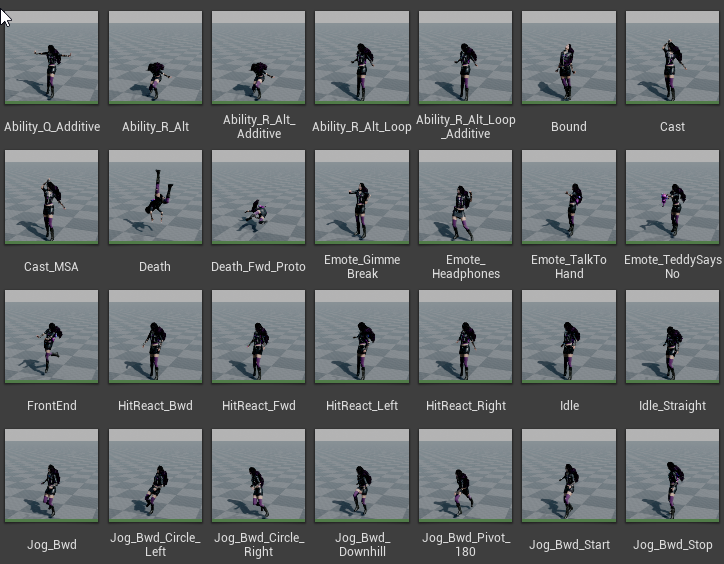
So within just a few days I already had a simple sandbox world to play in and a character that I can use for my shots.
Camera work
The next natural step was to start building my shots. The camera system in Unreal is very intuitive and I cannot stress enough what an amazing feeling it is to have full creative freedom over your photography.
Because everything is realtime, you can set up a camera, choose a lens, set up your shot in sequencer and then iterate and experiment as much as needed with everything, from camera placement and shot composition, to camera moves, camera speed, lens choices, lighting, character timing, everything!
Freeing yourself from the overhead of rendering, or playblasting grey proxy version of your geometry, allows for much faster creative iteration and much closer to a final shot. My previz already had interesting lighting, atmospherics and depth of field !
Editing
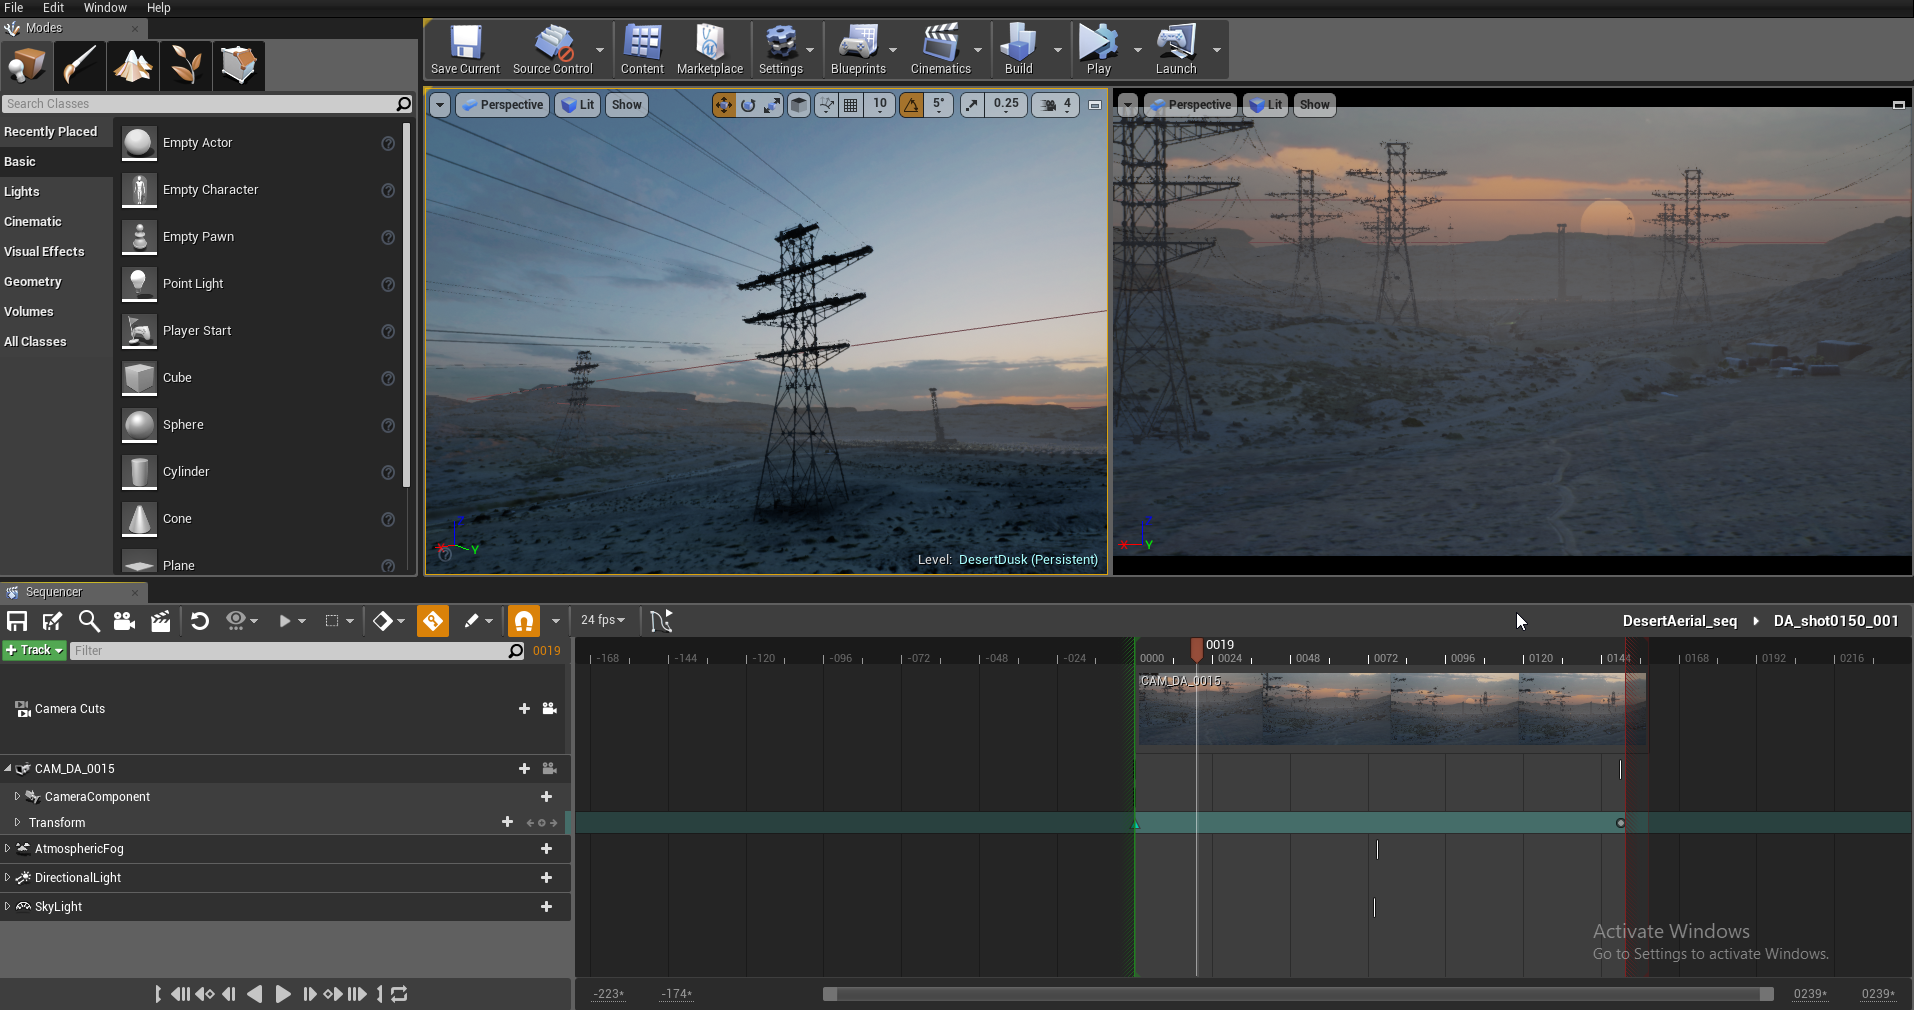
The editing process was extremely fluid, and it happened as I was building my shots. My goal was to have the edit live in Unreal, so I can already design the shots to flow with the music.
So I loaded the song into the sequencer and I was able to set up each shot but also play it in the context of the edit and with the song. Imagine using your favourite editing software, but having the possibility to control every aspect of the “footage” live, from the shot composition to the camera speed or the shot lighting. And there is no need for rendering, no need to create mountains of unnecessary data on your hard drive.
It is a very exciting process, that allowed me to try a lot of things even when a particular sequence wasn’t very clear in my head. You just start blocking a few shots, see how everything flows and iterate from there.
When you’re happy with the result, you can just render the full one, two or three minute sequence in realtime and just share it. 5,000 or 10,000 frames are not a problem when your render works at 30-60 frames per second.

Lighting
When it comes to lighting, I tried to keep things as simple as possible. Because I knew the result will be a rendered image sequence in the end, the frame rate was not one of my main concerns, as long as I kept good interactivity in the viewport. My goal was to stay around 24f/s.
Because I was using the sequencer to move objects around from shot to shot (especially in the city scenes), I wanted my lighting to be fully dynamic so I didn’t end up using any baking. This allowed me to do quick iterations, the core of my workflow.
The desert scenes had a minimal light set up, using a SkyLight and a DirectionalLight. In the city however I used quite a lot of extra spotlights, point lights and emissive materials for my neon surfaces.

One last thing that was crucial to creating the mood was the volumetric setup. I had an exponential height fog and atmospheric fog for the desert sunset scene. I loved the flexibility of being able to create atmospheric depth on such large scale and keep a beautiful color range through the volumetric haze.
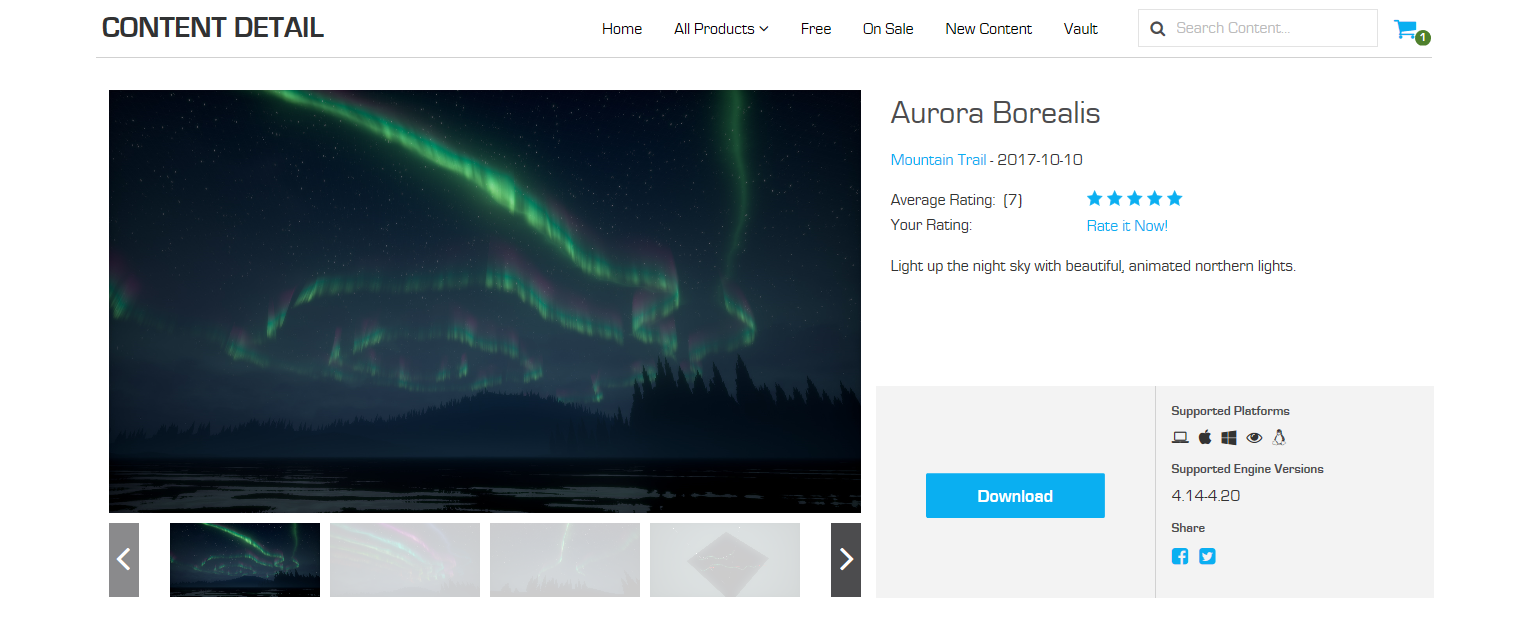
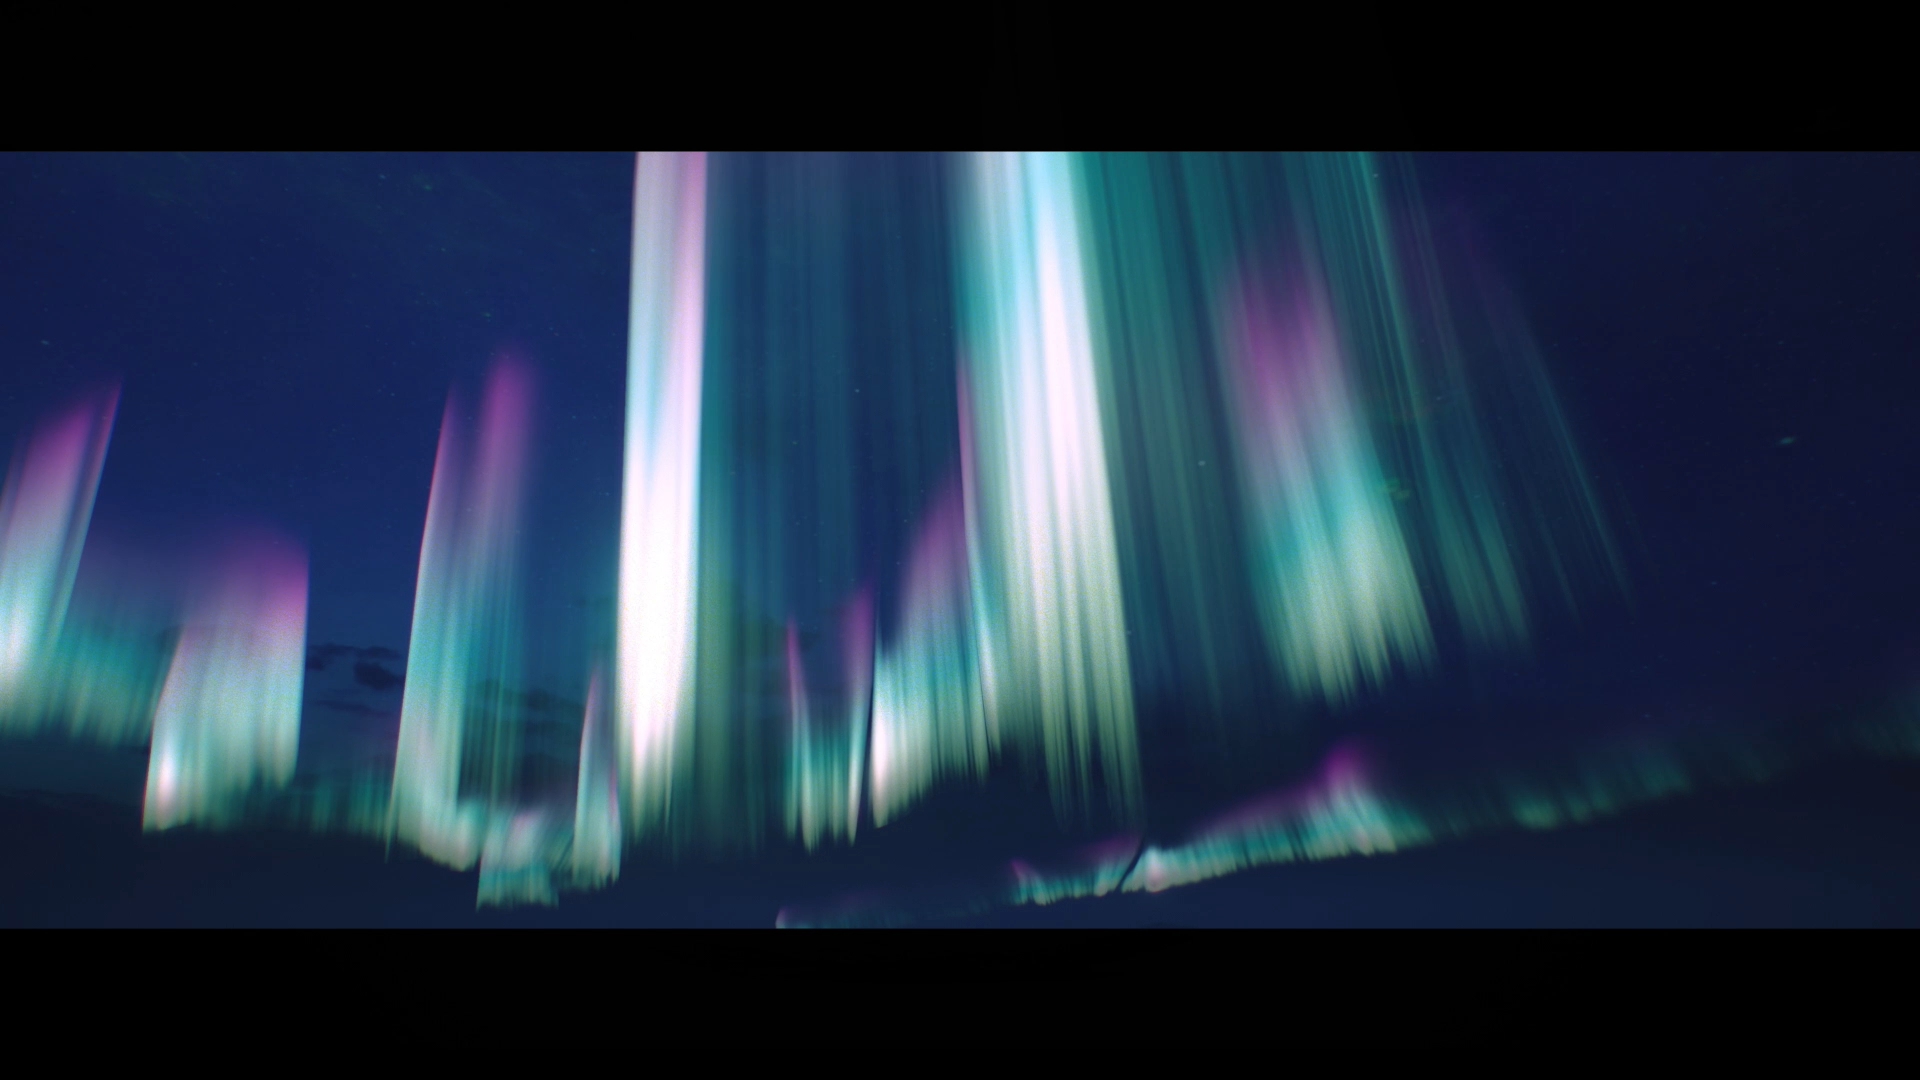
FX
The two main FX elements I needed for the video were the shooting stars and the aurora. The Unreal Marketplace was again the place to start from. There are fantastic FX assets at extremely reasonable prices, so I was able to take advantage of a nice spline based aurora system and an fx library that contained a laser setup very similar to what I needed.
So starting from a good base, and spending the time to understand the way the assets were built allowed me to modify where needed and make them work for my needs.
Here are the links to the two main assets I used for FX

Rendering
To render the previz I chose image sequences, because I realised compressing video was feeling a bit sluggish. So I went for 90% quality jpg files, in HD. This meant that rendering the sequences was extremely quick.
All the cinematic effects were also set up in the cameras and everything was rendered with a final beauty pass in my mind. This meant all the depth of field, bloom, motion blur and grain would already help create a cinematic look from the very first blocking versions.
I only used editing software to overlay the sound on top of my image sequence renders!

Plate Photography
The guiding principle in setting up the shoot was simple. Use the Previs and work with a very experienced team to make all the plate photography achievable in one day.
The project producer, Rosalind Stratton did an absolutely fantastic job in setting up the shoot in a very short amount of time. We wanted to be able to rely on a crew that has a lot of production experience, because the lighting setups we needed were not simple and we were trying to achieve quite a large number of shots in a one day shoot.

The team
After a few chats with the DOP, Eoin O'Liddigh, we decided on the size of the crew we would need and got in touch with Karl Saunders, Graham MacFarlane and Brian Compton. The guys did an amazing job and created a fantastic atmosphere on set. If there is one lesson to learn from this experience for a director that is just starting out, that is to build a crew as experienced as possible. They made setting up each shot look easy and the focus on the day was on the creative, not on chasing the clock to get that last shot. I couldn’t be happier or more grateful for their help.

The setups
To make everything achievable in just one day of shooting, I spent quite a bit of time with the previz and managed to narrow down the lighting setups to just three. The main city lighting for the intersection was used for a lot of the close up and medium shots. Then we set up a massive light source simulating the neon wall from the video. The last setup required the more localised lighting with some fantastic controls over the colors of the lights, needed for the night desert scene where the characters use their powers.

Due to the short timeline of the whole project, another big thing on my mind was making sure the plates would be easy to use in the post production stage. So most of the time, if the character is moving we kept the camera static, to remove the need for complex matchmove. The for the bigger camera moves, the shots are much wider and I used simple digidoubles of the actors. This allowed us to have very good variety in the choice of shots, from extreme close up to wide sweeping shots, without blowing the budget.

Digi doubles
Creating good digi doubles is a massive undertaking, and I was very aware that I needed to be careful with how I’m planning to use them. Having a clear idea that I will never get close to the models, they will always be static and lit as silhouettes, I was able to use a simple photogrammetry solution.
At the end of the shoot for the plate photography, we took a large number of photos of the artists in the studios setup. So with a bit of cleanup we had a digital version of each of our characters, ready to be used in Unreal.

Post Production
Once we had all the footage, I started working on the edit using the green screen plates.
Editing
The edit was done in DaVinci Resolve, and I started overlaying the photography over my previs. This process was actually very fast, because everything that was shot was based on the animatic done in Unreal Engine.
So the hard part was kind of already done, the step was more about finding the right take, and making sure the tempo of the action from the plate works with the surrounding shots. I did have to make quite a few adjustments, cutting some shots shorter and introducing new ones, but the video was starting to take shape.
Now that I had my two elements, the CG environment and the green screen plates, it was time to combine the two. And my plan was to do so in Unreal. I did a quick pass at the keys so I have placeholder versions with alpha.

Unreal plate setups
Next step was setting up all the shots with plates in Unreal. I decided to go for exr image sequences and set them up as streaming video textures. This allowed me to create an emissive material with opacity that was mapped onto an image plane, and in turn, I was able to very quickly adapt my previs cameras to the new plates. The lighting was already in a good spot because of the fantastic job done by the team on set.
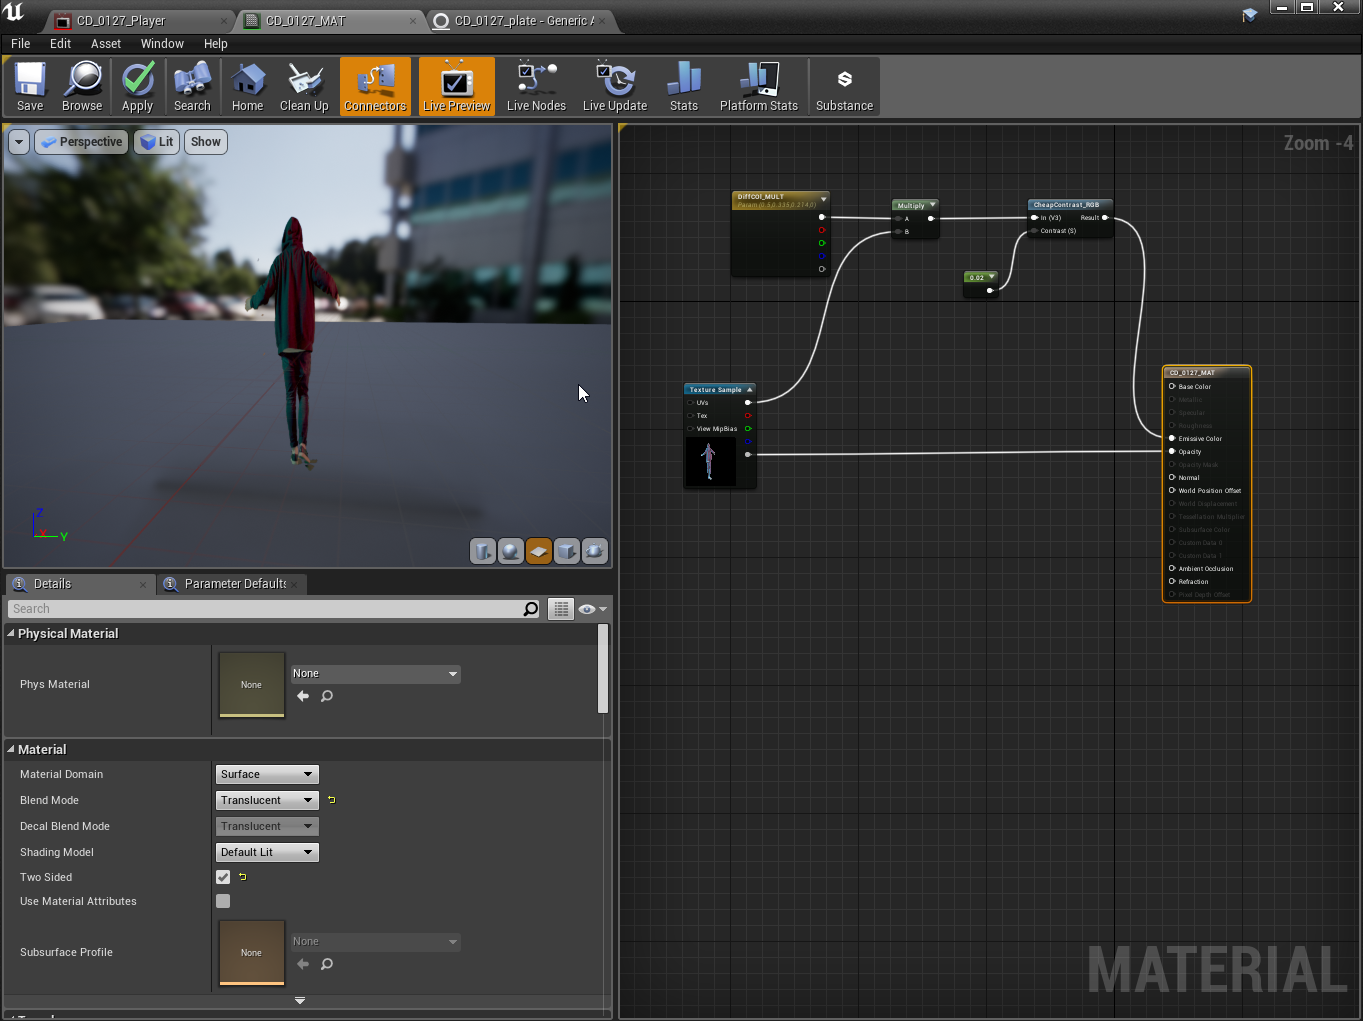
Some shots required reframing, so I used a card with the plate offset to the right plate in space. The fact that the plate is part of the CG environment makes integration very easy, because all the volumetric lighting and atmospheric effects are already encompassing the plate, so no compositing work was needed on a lot of shots. Almost every WS or EWS in the video is a render straight from the engine, without needing any extra compositing work.

With some very simple additions to the level blueprint I managed to sync the playback at render time. Everything had been set up at 24f/s so I didn’t have any trouble matching the timing I had in the edit. Even more so, I ended up using the frame control on the image sequence loader to adjust the timing on some of the plates, when I needed them just a bit faster.

New shots
Another interesting step was having a look at the overall edit once I set up all my plates and added all the preview comps in the edit. A few moments felt like they were missing something dynamic, so I decided to add a few extra interesting cameras around the city, so I can have some more abstract shot for the edit.
This was very easy to do, because the 3D scene is rendering realtime, so I literally started ‘walking’ around the scene, trying to find interesting angles. It is a fantastic feeling, similar to scouting a new location with your camera when practicing your photography.

Improving the scenes
At this stage I was happy with my edit, so I started building up my scenes, to reach a level of detail I was happy with for the final result. The guiding principle in this case was take the weakest section, build it up, then carry on to the next one. This way, I didn’t get stuck in detailing one set, and allowing a different section of the video to remain “unfinished”.
I applied the same continual iteration philosophy, slowly building my world, by adding extra assets in the desert, inserting bits of photography as textures in the city, set dressing with street furniture, etc.
A big addition at this steps were all the neon signs in the city, that were achieved using a simple emissive material, and good control over the bloom settings in the camera.

Final lighting
Once I was happy with the content of each set, all I had to do was go through each shot and do the final tweaks. The sequencer helped so much in this case, because I can have a single lighting setup for the whole sequence, but then have shot by shot overrides. This way you can get that perfect composition with the clouds rotated to just the right angle, or rotate your sun to hit an object in the right spot.

The fact that everything is realtime in the viewport, from detailed lighting to atmospherics, to live FX, makes building an image so much easier and interactive. It’s quite easy to get carried away tweaking a single shot for ages.

Final rendering
For final rendering I chose to stick with the image sequences and I rendered uncompressed 4K jpegs. It might seem a bit of a strange choice, but for me, it made a lot of sense.
I could tweak the look in the engine very closely to what I wanted, using the post processing tools for color grading, and having amazing control with the lighting and the atmospherics, I didn’t need to render heavy exrs with tones of extra passes for compositing. I know that is all possible, but my goal was to have this flexible and extremely fast setup.
And with the smaller file sizes, playblack in the editing software was always smooth, which was another massive advantage.

Compositing in Unreal
The reality of a lot of VFX productions is that a lot of the heavy lifting has to be done in comp. This can happen for multiple reasons, but the main factor is being able to keep creative control in the later stages of the pipeline, allowing flexibility to client feedback.
Well, when you are rendering at 20 frames per second, having to rerender a shot is no longer an issue. So I was able to use motion blur and depth of field in a creative way from the moment I was building the shot, down to the final renders.
Because the post processing controls are all in the cameras, you can use the sequencer to tweak and animate everything in order to hit the result. From control over focus ( manual or tracking) to complex color grading, image effects like bloom or chromatic aberration, the engine allows to tweak the final frame and achieve that cinematic look.
I even had the vignette and grain baked into the renders, because I made it a goal to get as close as possible to the final pixels.

The other fantastic thing was being able to render shots with the plates already integrated. As I explained earlier, because of a good flow between previs - photography - post production, I had a good number of shots that didn’t need any additional compositing outside the engine.
The image plane was already placed in 3D space and getting hazed based on the volumetric atmosphere around it, and the realtime lighting allowed me to make sure the characters sits well with its surrounding environment.


Compositing in Nuke
I used the same advantage, the fact that I can tweak the lighting interactively while having the plate live in the engine, to create background that were easy to integrate for the closer shots.
The team from Safe Frame, a small vfx studio in Bucharest Romania helped me with some final keying and detail integration of the plates into the CG backgrounds. Even if this was quite meticulous work, the fact that a lot of the CG lighting and atmosphere was done together with the plate helped tremendously.

The project was an amazing challenge and it was incredibly exciting to be able to have some much control over the creative aspect of the whole process. I really believe that realtime technology is bringing a revolution in filmmaking and I can’t wait to see what amazing work will be created next.
Thanks a lot!
Credits:
Director Alexandru Popescu
Producer Rosalind Stratton
Director of Photography Eoin O'Liddigh
Focus Puller Graham MacFarlane
Gaffer Karl Saunders
Lighting Best Boy Brin Compton
Production Manager Fenella Stratton
VFX Supervisor Alexandru Popescu
VFX Production Manager Stefan Popescu
Additional Post Production Safe Frame
Landscape Photogrammetry Effective Technology Integration
Additional Models Denis Loginovskiy
Make up/Hair Aya Hirst
Clothing by Dead Studios
Camera Equipment Panavision Inc
Lighting Equipment Flashlight Film Services Limited
Studio Lot23
